
Your event happened. Now you have two minutes of work left: mark who was actually there. Rook Ready’s four-state attendance model — Present, Absent, Late, Excused — is designed for the bulk-then-tweak workflow most clubs need: one click to mark everyone Present, then flip the handful of exceptions.
Before you start
Three things need to be in place:
- A published event with attendance tracking enabled. Creating Your First Event covers the Enable attendance tracking toggle on the create form.
- Members on the roster. Adding Members covers all three ways to get people in.
- An event that’s already happened (or is in progress — you can mark attendance live).
RSVP vs. attendance
The four states
- Present — full participation, on time.
- Absent — no-show, no notice given.
- Late — showed up after the start time. Use Late rather than Present so attendance trends accurately reflect punctuality over time.
- Excused — didn’t show, but gave notice in advance (sick, traveling, family obligation). The Absent-versus-Excused distinction matters when you review patterns later: Excused absences reflect communication and accountability; unexplained Absent entries don’t.
Mark attendance
Open the event detail page and scroll down to the Attendance section. Each member on your roster appears in a row with a four-button group: Present / Absent / Late / Excused. None are selected until you mark them.
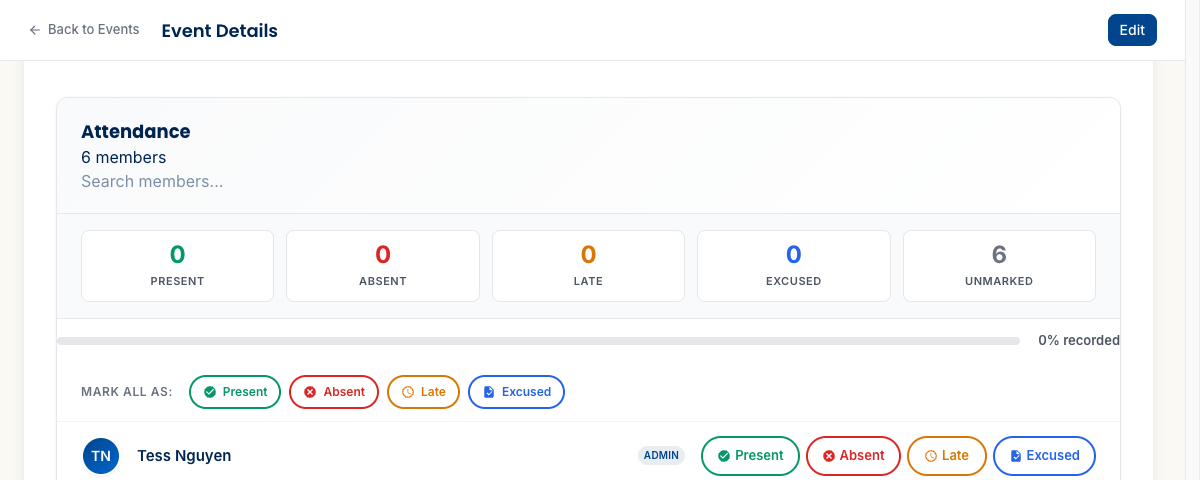
Step 1: Mark all as Present
Click Mark all as: Present. That’s one click — no confirmation dialog. Every unmarked member flips to Present instantly, the summary cards update, and the progress bar jumps to 100% recorded. For a typical club where most members showed up, this is the right first move.
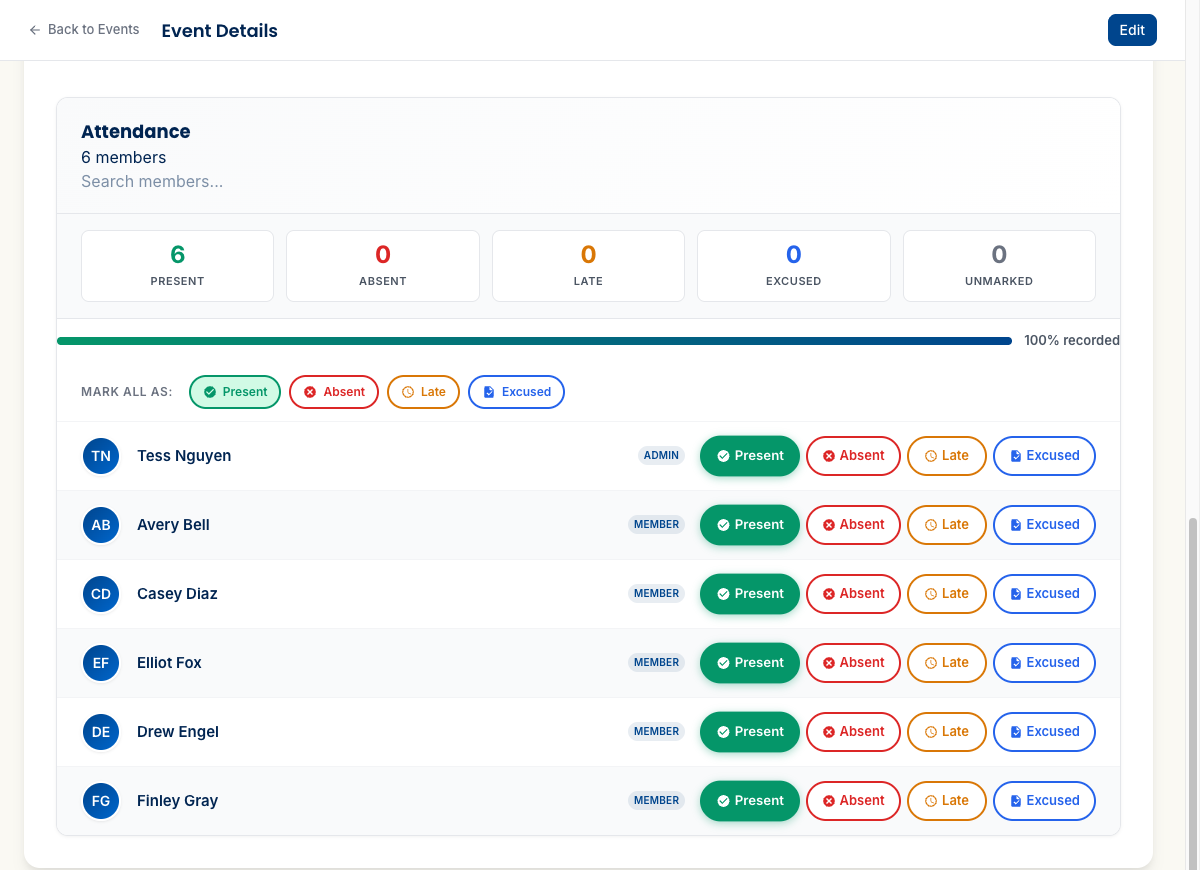
Step 2: Flip the exceptions
Click the right state button on each row that needs adjusting. The button group is exclusive — clicking a state selects it and deselects the others, with no delay. Mark Late on members who arrived after the start time, Excused on anyone who gave notice they’d miss it, and Absent on the no-shows.
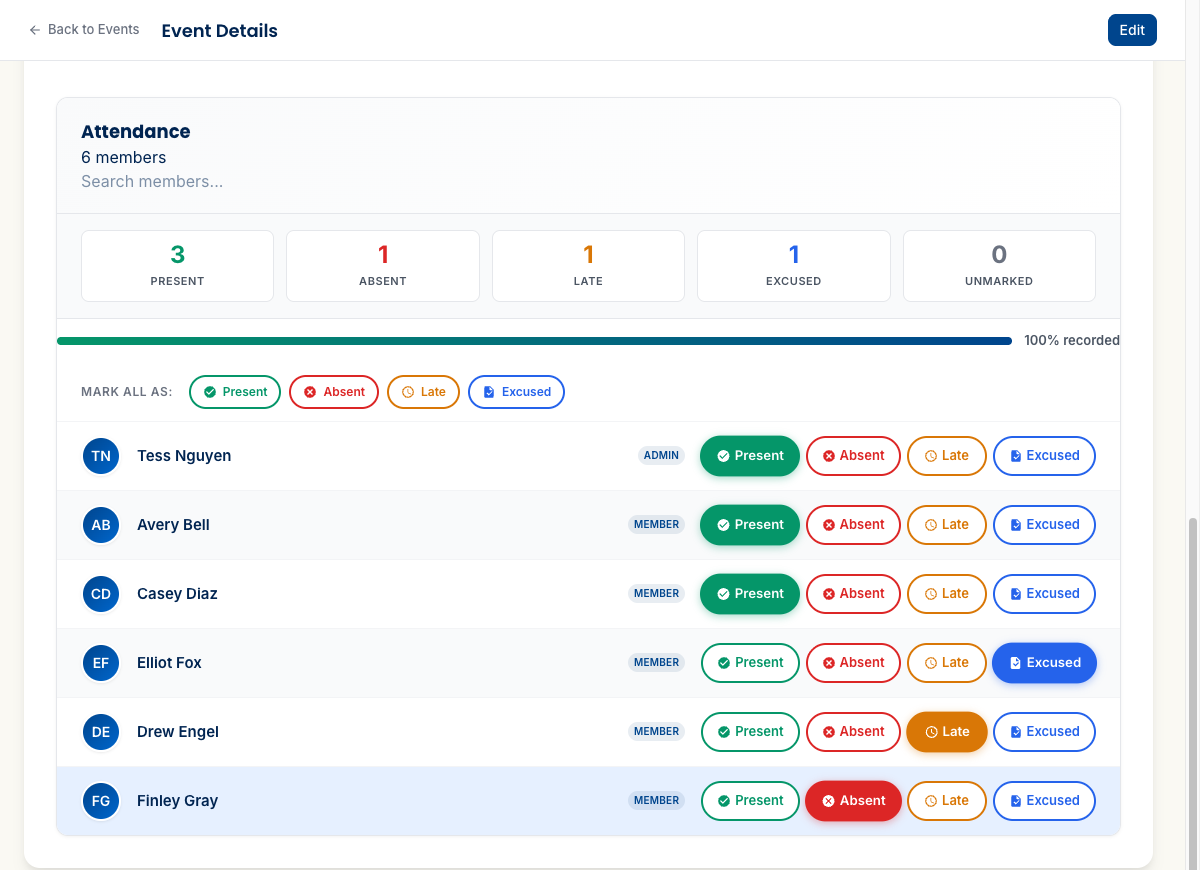
That’s it. No save button — each state change persists immediately.
The Attendance Deadline
When you enable attendance tracking on an event, an Attendance Deadline date field appears on the create and edit forms. It’s useful as a target — a reminder to get your records in before that date.
In the current build, the deadline is informational. The UI doesn’t lock the attendance section or display a warning after the date passes; you can still mark and adjust attendance freely. The field is a placeholder for future enforcement — expect that to change as the product matures, but for now, treat it as a note to yourself rather than a hard cutoff.
Where attendance shows up later
Per-event, it’s on that event’s own page: open the event detail page and scroll to the Attendance section for the full record of who was marked what. There’s still no attendance tab on a member’s own profile — that per-member view isn’t part of the product.
For a cross-member view, admins have an Attendance report: click it from the Events list header to open a club-wide report you can filter by date range, recurring series, event type, and — to see how often one person has shown up — a single member. It exports to CSV, and it’s included on every plan, Pawn too. That covers the “how often has this member come to things” question the old per-event view couldn’t answer on its own, just from Events rather than from the member’s own page.
What’s next
This is the last guide in the four-guide arc: Getting Started → Adding Members → Your First Event → Recording Attendance. If you’ve followed along in order, your club has a roster, a published event, and attendance on the books.
If you landed here first and still need the earlier pieces:
- Create a published event with attendance tracking enabled — that’s the prerequisite for this guide.
- Build your member roster — you need people on it before there’s anyone to mark.
More guides will land as the product grows — meanwhile, the FAQ has answers to most questions, and you can always email support@rookready.com.
Updated September 29, 2026