
Your club exists. Now it needs people in it. Rook Ready gives you three ways to build your roster — pick the one that fits where you are right now.
Before you start
A quick decision tree:
- You have a spreadsheet (Excel, Google Sheets, or a CSV export from another system) → use the CSV import. Even a rough file with just first and last names works.
- You have a handful of members and all their details → add them one at a time using the Add Member form.
- You’d rather have members fill in their own info → add them manually but enter their email address and leave Send invite checked. Rook mails them a link to complete their own profile.
You can mix and match — import a CSV, then add a few stragglers by hand. There’s no wrong order.
Add one member at a time
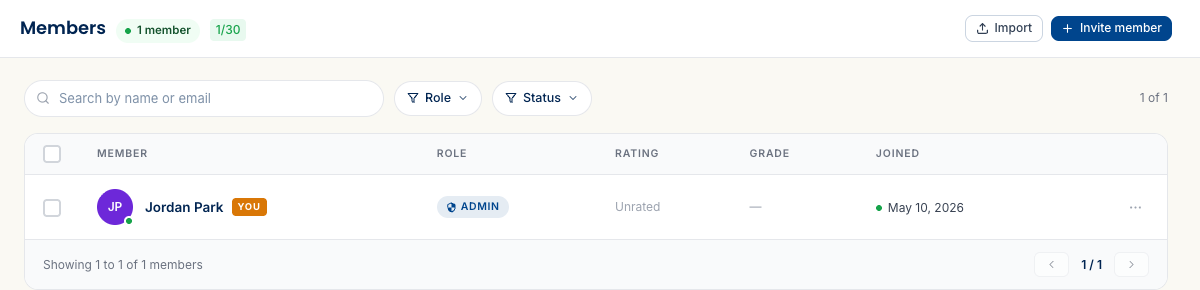
Click Add Member (top right of the Members list, or the quick action on the dashboard). The form has three required fields — First Name, Last Name, and Role — plus optional fields for phone, date of birth, and as many email addresses as you like.
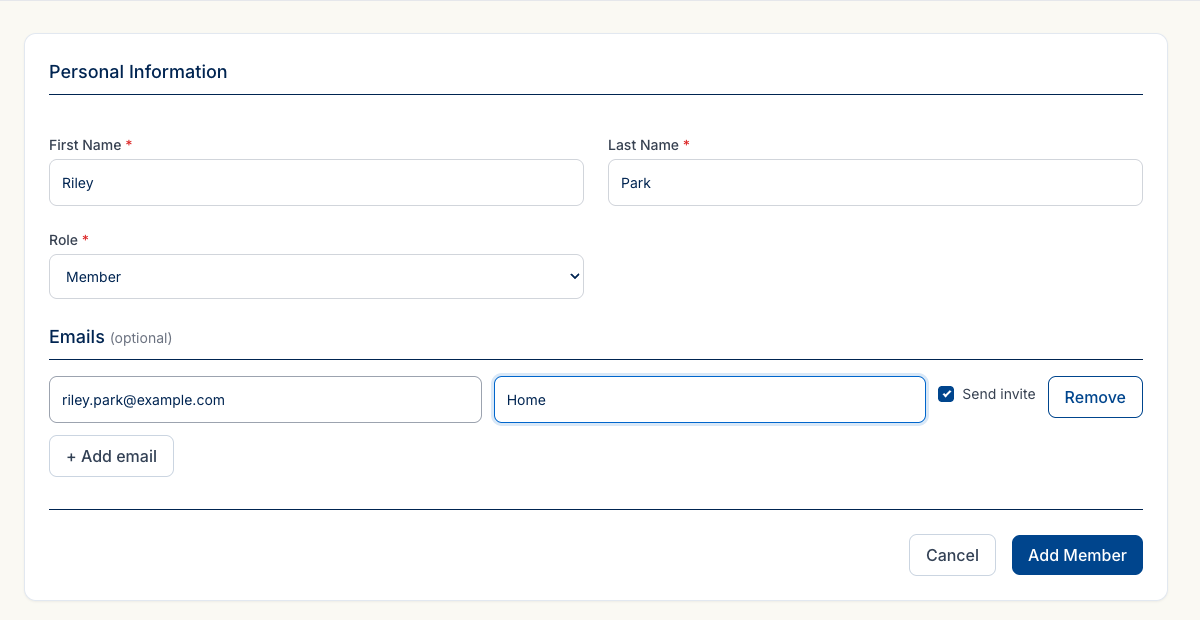
Each email address you add has two optional extras: a Label (like “Personal” or “Work”) and a Send invite toggle.
Hit Save and the member appears in your roster. You can always come back and add an email, edit details, or invite them later.
Bulk import with CSV
If you have more than a few members, importing a file beats data entry. The import wizard has four steps.
Prepare your file
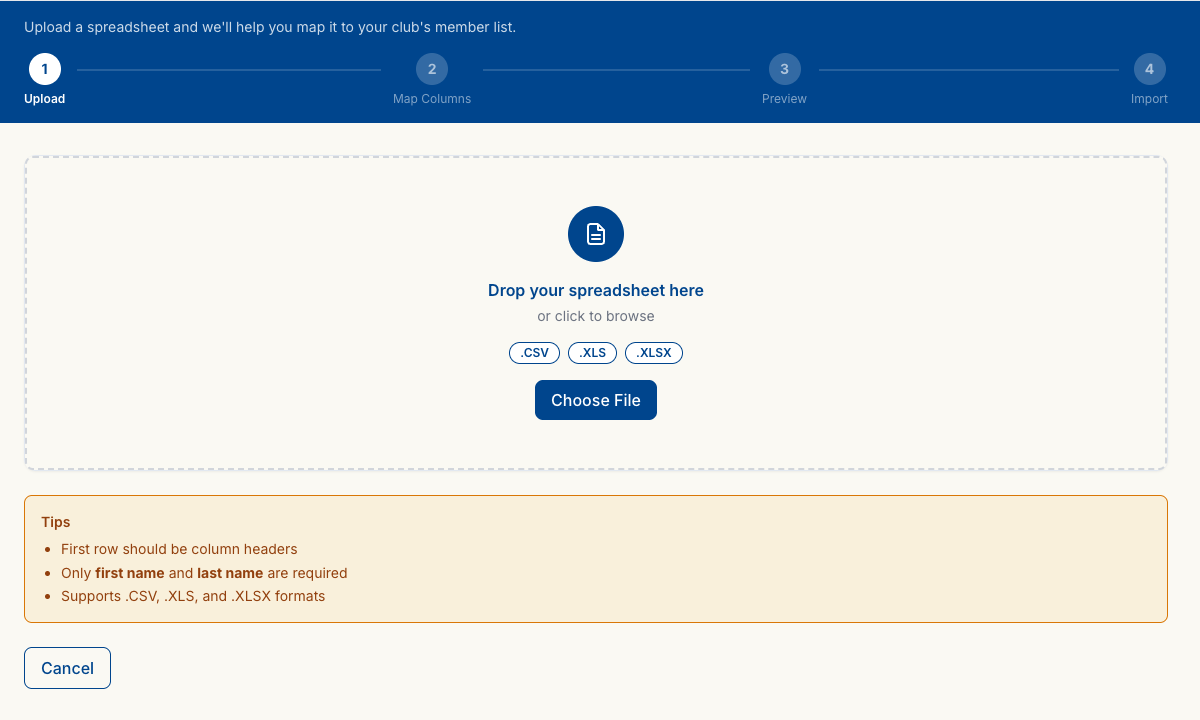
You can upload a .csv or .xlsx file. (Older Excel 97-2003 .xls files aren’t supported — open one in your spreadsheet program and save it as .xlsx first.) The only two required columns are first name and last name — everything else is optional. If your spreadsheet has extra columns you don’t need (notes, old system IDs), that’s fine; you’ll get to skip them in the mapping step.
A few things that help:
- Put column headers in the first row. Rook reads them to auto-match common names like “First Name”, “Last”, “DOB”, and “USCF ID”.
- Leave cells blank for fields you don’t have — don’t use placeholder values like “N/A”.
- One member per row. Multiple emails per member aren’t supported in CSV; add them afterward from the member detail page.
Step 1 · Upload
Go to Members → Import (the arrow-down icon next to Add Member). Drag your file onto the drop zone, or click to browse.
Step 2 · Match your columns
Rook auto-matches common column headers and tells you how it did: “Auto-matched 2 of 3 columns. Review and adjust mappings below.” Each column in your file gets a dropdown where you confirm or override the target field.
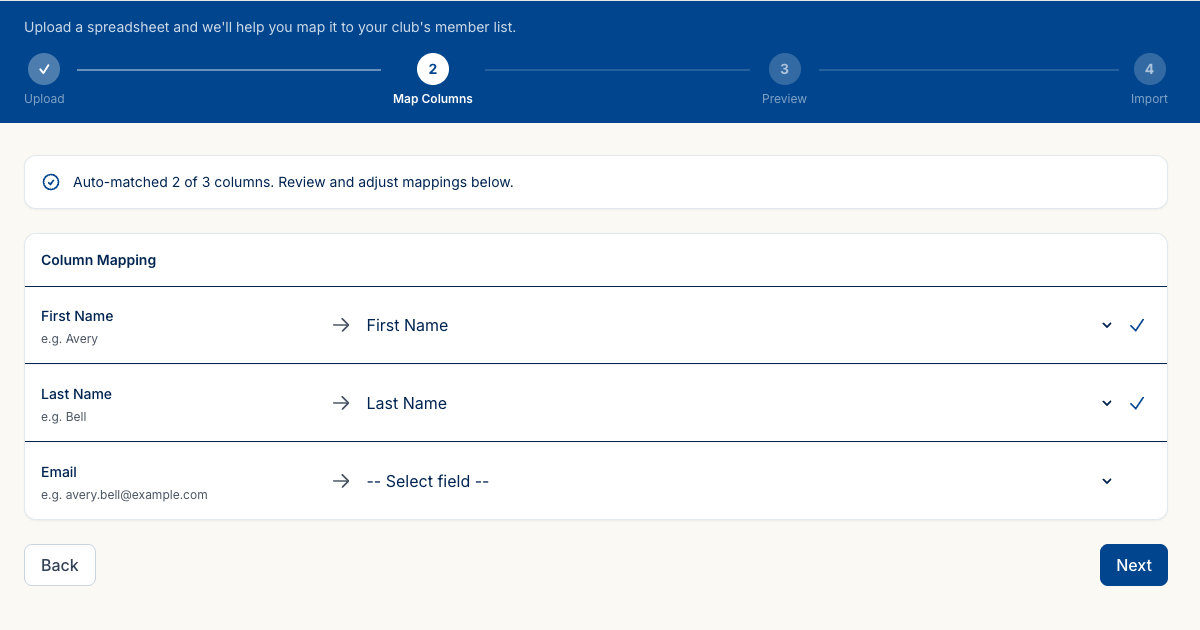
The full list of target fields includes: Name (Full), First Name, Last Name, Email, Role, Status, Birth Date, Grade, Joined At, Contact Email, Contact Phone, USCF Rating, USCF ID, FIDE Rating, FIDE ID, CFC Rating, CFC ID, Skip this column, and Create custom field.
Step 3 · Preview
Rook shows you every row with a per-row status before a single member is written. You’ll see a summary line like “5 rows · 5 valid · 0 errors · 3 columns mapped.” Rows with problems are flagged inline so you can fix the source file and re-upload before committing anything.
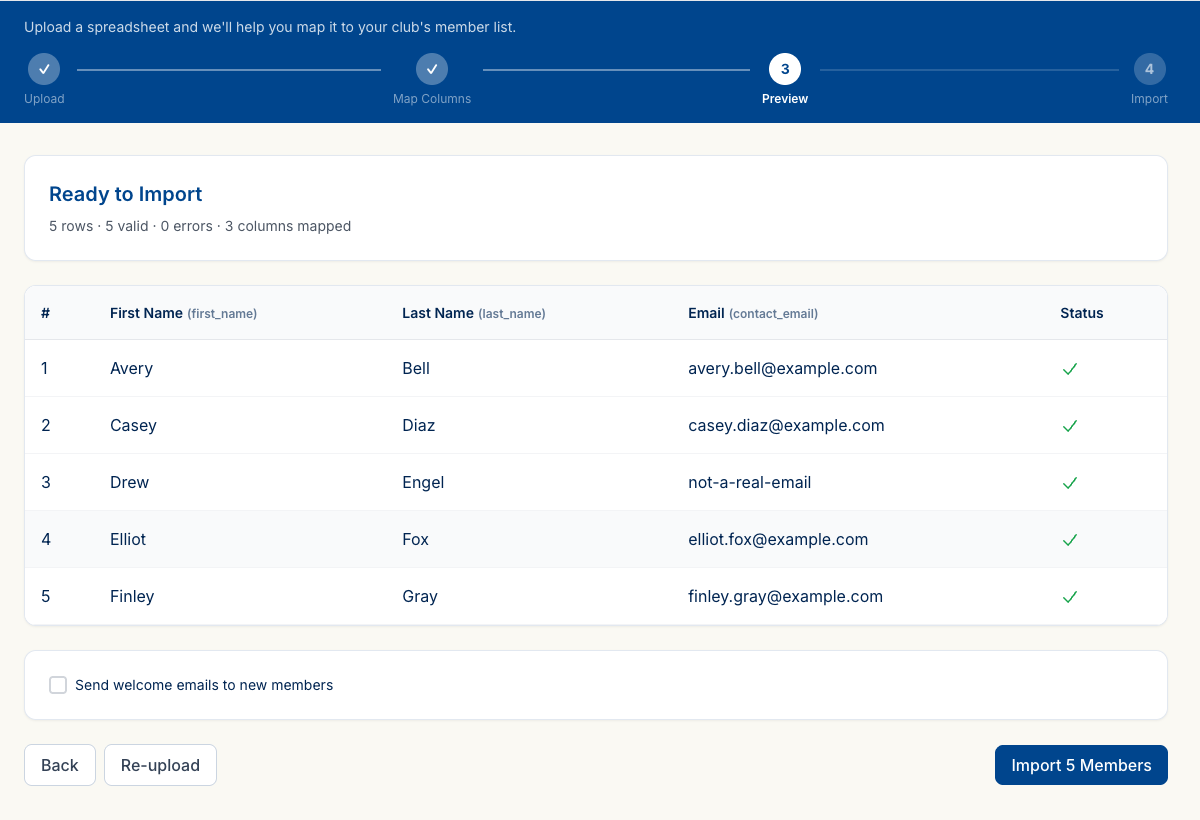
At the bottom of the preview there’s an email choice with three options: Invite them to set up an account (same invitation flow as manual entry — they get a link to set a password and sign in), Send a welcome email only (tells them the club added them, but does not let them sign in), or Send nothing for now. Pick the one that matches what you want this roster to be able to do on day one.
If you spot a problem, click Re-upload to go back to the upload step. The wizard lets you start over from the beginning, so you can fix the source file and try again.
Step 4 · Import
Click Import N Members. Rook processes the file and lands on a result screen.
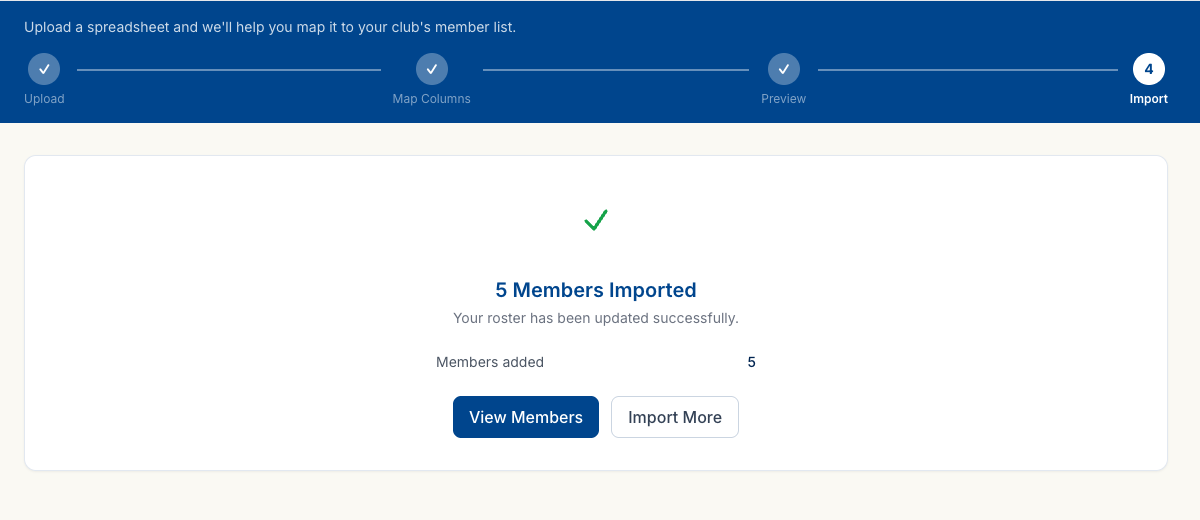
That’s it. Your roster now has everyone from the file.
Adding guardians for youth members
For youth members, you’ll likely want a parent or guardian linked to their record. This isn’t instant — it’s an invitation flow, because the guardian needs their own account to complete the link.
If you already have the guardian’s email when you first add the member, you don’t need a second trip: enter it as one of the member’s emails on the Add Member form (see Add one member at a time above) and check Send invite. It’s the same invitation — when the guardian opens it, they’ll pick “This is not me — I manage their account” instead of setting a password for the child, and the link is made the same way as below.
To send that invitation later instead, open a member’s detail page and find the People with access card. Click Invite. A modal opens with two fields: the guardian’s email address and an expiration window (7, 14, or 30 days — defaults to 14).
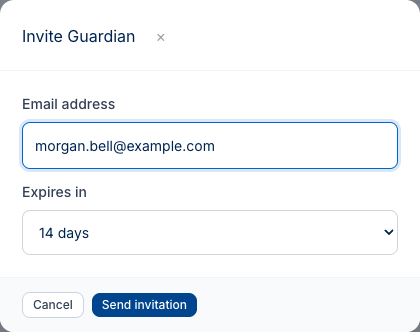
Click Send invitation. The guardian receives an email, clicks the link, creates their Rook account, and is then linked to the member’s record. Until they accept, they appear under Pending invitations with their email, how long until the link expires, and Resend and Cancel buttons. The count beside the card title stays at 0 (with a “· 1 pending” note) until acceptance — that’s by design, not a bug.
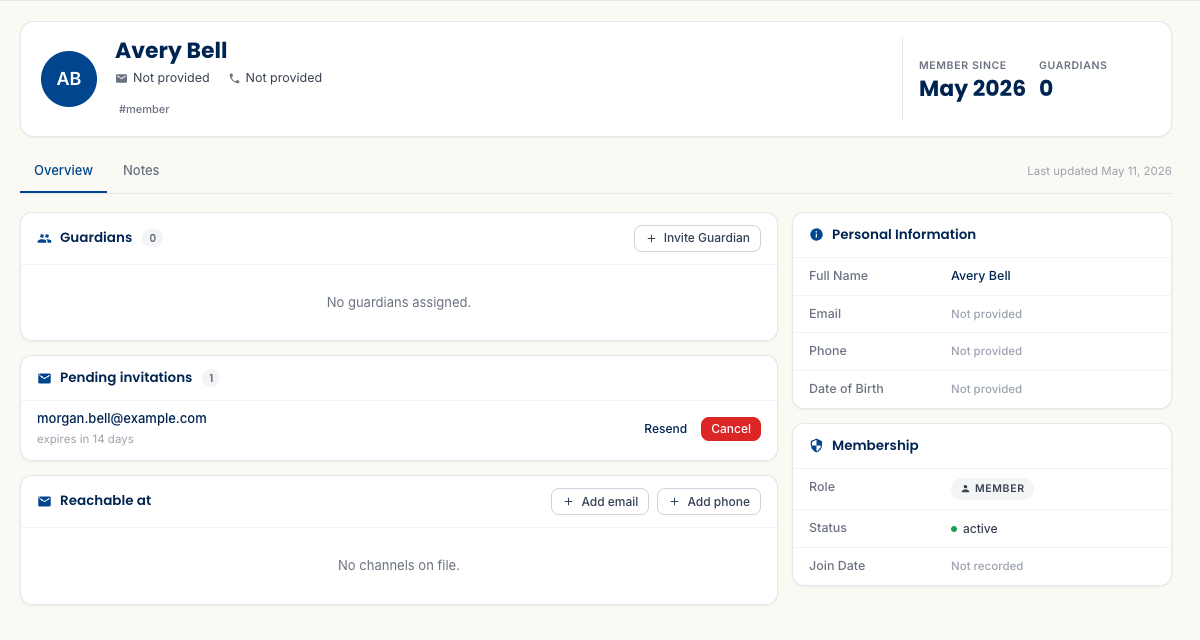
If the email doesn’t arrive, use Resend. If you invited the wrong address, Cancel and start over.
A note on custom fields
What’s next
Your roster is built. The next things most clubs do from here:
- Create your first event — practices, tournaments, lessons.
- Record attendance — track who showed up using the four-state workflow.
- Send your members to the app — a guide written for them rather than for you, covering RSVPs, updates, and following a tournament from a phone.
If you get stuck, the FAQ has answers to the most common questions, and you can always email support@rookready.com.
Updated September 25, 2026